|
Yeast: Information and
Classroom Activity
What’s smaller than the point of a pin, likes something
sweet to eat and a nice warm bath to lie in? It’s yeast – Frisky
yeast, the force in dough that makes it grow!
 Every place where the light shines through is the very
same place where frisky yeast grew. Every place where the light shines through is the very
same place where frisky yeast grew.
Yeast is the magic in bread. It’s is a living organism – a
single celled spore or "seed" of a fungus that is in
the air all around us and makes bread rise through a process called
fermentation.
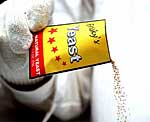 Most bread bakers use a strain of yeast which scientists call
Saccharomyces cerevisiae. It is packaged in small foil packets,
and you can buy it at any supermarket as "active dry baker’s
yeast". The packet has about a tablespoon of tiny beads, and
each bead holds millions of spores of "sleeping" yeast.
When the yeast is dissolved in a cup of sweetened lukewarm water,
it will awaken like seeds from its resting state and begin to multiply.
As it multiplies through cell division, it bubbles up into a froth,
giving off carbon dioxide. When these bubbles are trapped in bread
dough, the dough will rise higher and higher. The starches in bread
dough are also food for re-producing yeast; and the yeast, in turn,
gives bread it’s special flavor and lightness. Yeast may
be tiny, but millions of spores can double the volume of bread
dough in just a few hours. Most bread bakers use a strain of yeast which scientists call
Saccharomyces cerevisiae. It is packaged in small foil packets,
and you can buy it at any supermarket as "active dry baker’s
yeast". The packet has about a tablespoon of tiny beads, and
each bead holds millions of spores of "sleeping" yeast.
When the yeast is dissolved in a cup of sweetened lukewarm water,
it will awaken like seeds from its resting state and begin to multiply.
As it multiplies through cell division, it bubbles up into a froth,
giving off carbon dioxide. When these bubbles are trapped in bread
dough, the dough will rise higher and higher. The starches in bread
dough are also food for re-producing yeast; and the yeast, in turn,
gives bread it’s special flavor and lightness. Yeast may
be tiny, but millions of spores can double the volume of bread
dough in just a few hours.
Yeast is wild. Catch some in a jar.
Take a deep breath! You’ve just inhaled millions of spores
of invisible yeast. Since the days of ancient Egypt, 6000 years
ago, right up to the present, bakers have captured and used this
wild yeast to make bread. And you can do it right in your own kitchen:
Here’s how:
1. Mix a cup of flour (whole wheat or white) with a cup of lukewarm
water in a quart jar, and stir them together until they are smooth.
Place the mixture on a shelf or windowsill and leave it uncovered
so the yeast will be able to find food. Now wait and watch it
change over the next several days.
2. Stir the mixture each day with a wooden spoon or chopstick.
After a few days, it will start to smell a little sour and become
sticky. Be a scientist, and take notes about it's smell, taste,
feel, and looks. The mixture is fermenting -- another way of
saying that it is attracting invisible wild yeast which are feeding
off the flour and water and changing everything in the process.
Once it begins to ferment, place a cloth napkin or piece of cheesecloth
over the jar to keep it from drying out on top.
3. After 5-10 days, depending on the place and temperature of
the room, you will notice little bubbles in the mixture. This
is carbon dioxide which is a by-product of the reproduction of
the yeast. Notice that the smell is more pleasant - almost like
peaches. Give it another five days to build strength, stirring
it daily and feeding it by adding a few tablespoons of flour
and maybe a little water if it is too dry.
4. You now have a cup of sourdough starter that you can add
to your bread dough to make it rise. Store it in the refrigerator
to keep it fresh and to slow down the fermentation process. After
you have added it to the flour and water you will use to make
your bread dough, be sure to take a cupful out before adding
any other ingredients so it will stay pure and be usable again
and again. And remember to stir it and feed it at least once
a week with a little flour and water. You can freeze it, too.
|